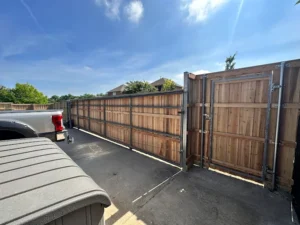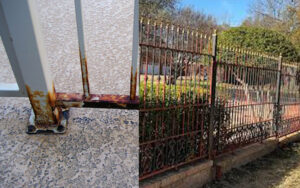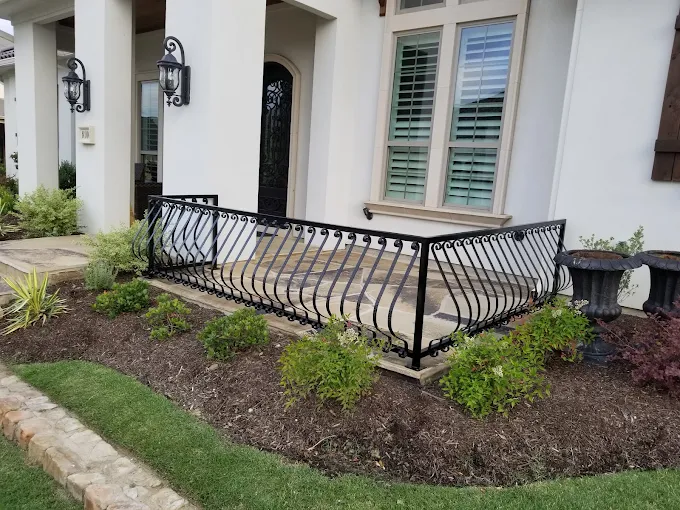
Most surface rust, loose pickets, and minor paint failure are realistic DIY repairs for a motivated homeowner. If you’re seeing soft or spongy metal, leaning posts, multiple failed welds, or a gate that no longer closes squarely, stop and call a qualified contractor. The structural risk and the safety complications, particularly lead paint on older fences, make those repairs a job for experienced hands.
Your next three steps: spend 10 minutes on a hands-on inspection, photograph every problem area before you touch anything, then decide whether to follow the DIY steps below or contact a professional for a written estimate.
Key Takeaways
Surface rust and loose pickets are realistic DIY repairs; soft metal, leaning posts, or failed welds require a qualified contractor before the damage compounds.
| Point | Details |
|---|---|
| DIY vs. pro decision | Surface rust, loose pickets, and missing bolts are DIY; soft metal, leaning posts, or multiple failed welds need a contractor. |
| Lead paint safety | Test for lead before grinding or sanding any fence painted before 1978; upgrade to N100 respirator if positive. |
| Repair sequence | Stabilize structure first, then remove rust, apply converter, prime, and topcoat in that order. |
| Cost range | Surface rust and repaint runs $50 in DIY materials; professional structural welding typically costs $250 per section. |
| Eastonfencingtx | Provides free on-site estimates, in-house welding, and fully insured wrought iron fence repair across North Texas. |
Table of Contents
Is your iron fence repair a DIY job or a contractor call?
How to inspect and document your fence before any work begins
How to stabilize posts and fix major structural issues
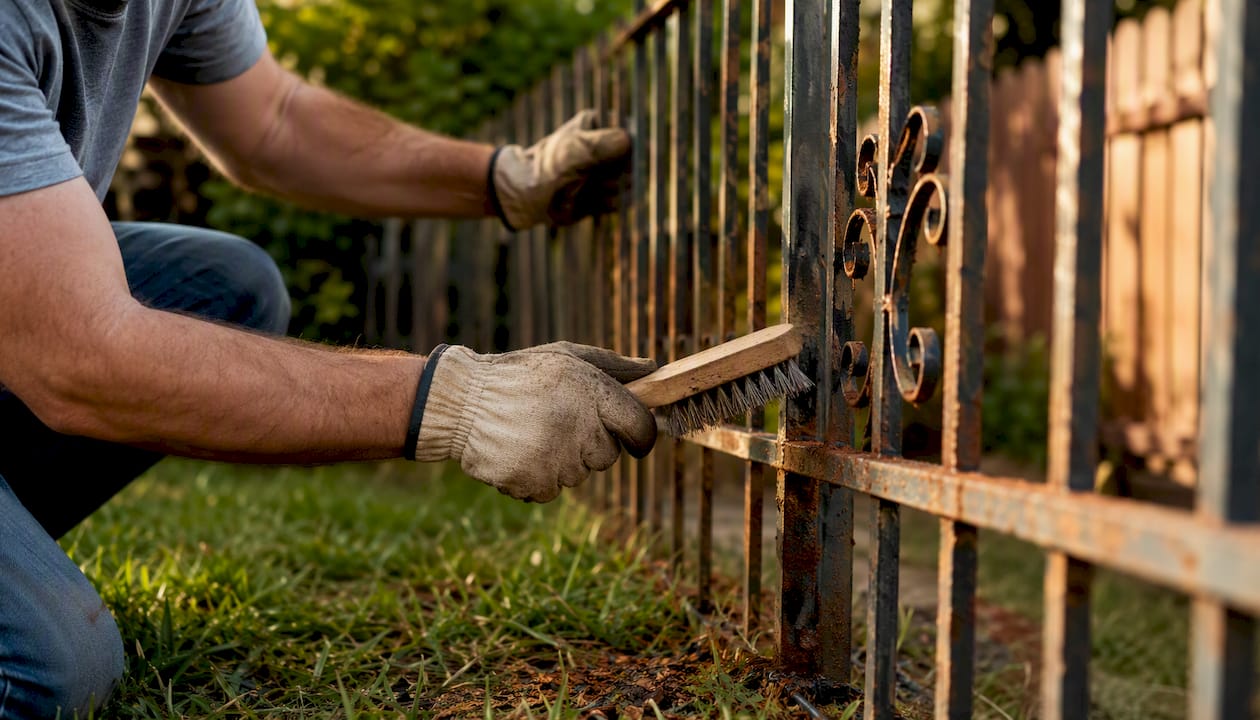
How to remove rust without damaging decorative or historic detail
How to treat residual rust and choose the right primer
Topcoat options and how to apply them for long-term protection
Tools and materials checklist for basic iron fence repair
Typical repair costs and timelines for U.S. homeowners
When should you hire a pro instead of doing it yourself?
Safety, environmental, and permit considerations
How Easton Fencing approaches iron fence repair and restoration
Eastonfencingtx offers free estimates for professional iron fence repair
Is your iron fence repair a DIY job or a contractor call?
Run through this checklist before you buy a single wire brush. Each item takes under a minute to check, and the pattern of answers tells you everything you need to know.
Visual and tactile checks:
Look for paint bubbling, orange streaking, or flaking along rails and at post bases.
Press firmly on any suspect area with your thumb. Sound metal is hard and unyielding. Soft or crumbling metal means corrosion has eaten through the wall thickness.
Grab each picket and push it side to side. A slight flex is normal; a picket that rocks freely at the base has a failed weld or a corroded socket.
Sight down the fence line. Any section that sags, bows outward, or leans more than a few degrees has a structural issue.
Check every bolt head and nut. Finger-tight or missing hardware is a quick DIY fix; bolts that have sheared flush with the rail need drilling out.
Look at where posts meet the ground. Rust staining in a ring around the post base, or visible gaps between the post and its concrete footing, signals moisture intrusion at the most vulnerable point.
The decision rule: If your only findings are surface rust, bubbling paint, one or two loose pickets, or a missing bolt, this is a DIY job. If you found soft metal, a leaning post, cracked concrete footings, multiple failed welds, or a gate that won’t align. Hire a qualified fence contractor. According to homeowner-focused guidance, surface rust and small repairs are DIY-manageable, while deep pitting and structural failures usually require professional welding or section replacement.
One-line safety flags: Stop immediately if you suspect lead paint (any fence painted before 1978), if rust is so thick it flakes off in sheets, or if the fence sits against stone or masonry that could be permanently stained by chemical treatments.
How to inspect and document your fence before any work begins
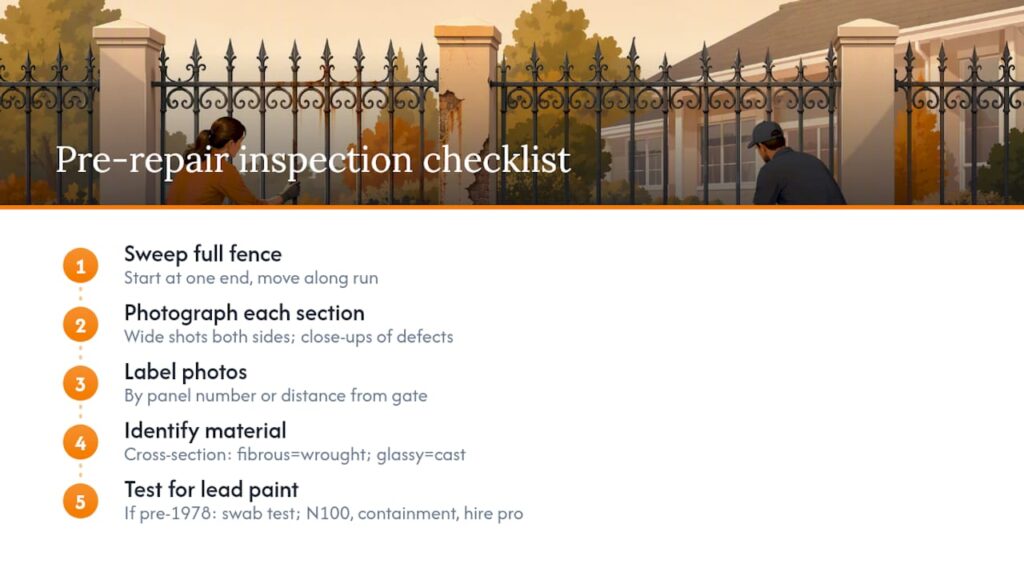
A systematic inspection before you pick up a tool saves you from discovering hidden damage mid-repair and gives any contractor a clear picture of the scope. Start at one end and work your way along the full run.
What to photograph: Take wide shots of each fence section from both sides, then close-up shots of every problem area. Get underneath rails where water pools, shoot bolt heads and weld points at the base of each picket, and capture the post bases at ground level. If any original paint color or decorative detail is still intact, photograph that too. Label images by panel number or by distance from a fixed reference point (the gate post, a corner) so you can match photos to locations later.
Identify your material. Cast iron is brittle and was used primarily in ornamental Victorian-era fencing; it fractures rather than bends. True wrought iron is fibrous and tough, common in pre-1950s work. Modern mild steel or tubular steel is what most residential fences installed after 1970 are made from. The distinction matters because cast iron requires different welding techniques than mild steel, and historic wrought iron may need a specialist. If you’re unsure, look at the cross-section of any broken piece: wrought iron shows a fibrous grain, cast iron is glassy and crystalline. You can also check Eastonfencingtx’s wrought iron fence resource for visual examples of material differences.
Lead paint testing. The NPS conservation guidance and restoration specialists both emphasize this step: if your fence was painted before 1978, test for lead before sanding or grinding anything. Swab test kits are available at most hardware stores for under $15. A positive result changes your entire approach. You’ll need an N100 respirator (not just an N95), full containment sheeting, and in many cases a licensed lead-safe contractor. Do not skip this step.
How to stabilize posts and fix major structural issues
Stabilize before you treat. A beautifully painted fence on a leaning post is a repair that fails in the first hard rain. Work through structural fixes in this order.
Tighten or replace loose hardware. Use a wrench to snug every bolt and nut along the fence run. Replace any that are visibly corroded with grade-5 or grade-8 bolts in the appropriate diameter. For iron-to-iron connections, stainless steel fasteners work but introduce a galvanic pairing that can accelerate corrosion at the contact point in wet climates; use a zinc-based anti-seize compound or nylon washers to isolate the metals.
Drill out seized bolts. Center-punch the bolt head, start with a small pilot bit (1/8″), then step up to a bit slightly smaller than the bolt’s thread diameter. Use a screw extractor to back out the shank. If the bolt shears below the surface, a left-hand drill bit often backs it out on its own.
Brace a leaning post temporarily. Before you attempt to re-set a post, brace it plumb with two wooden stakes and tie wire so it can’t shift further. This protects the fence line while you assess the footing.
Re-set a post in degraded concrete. Dig out the old footing, remove loose concrete, and clean the post base of rust and soil. Set the post in a tube form with fresh concrete, check plumb on two axes, and brace until cured (typically 24–48 hours depending on temperature). Structural issues often trace back to moisture at post bases; eliminating soil contact at the metal junction is the most important long-term fix.
Splice a damaged rail section. Cut back to sound metal on both sides of the damaged area. Fit a sleeve of matching-diameter tubing over the joint, or butt-weld a new section of matching stock. Welding over rust creates porous, weak joints; always cut back to clean, bright metal before striking an arc.
Red flags that require a contractor: soft or spongy metal anywhere in the post or rail, posts set in crumbling concrete that can’t be stabilized without excavation, multiple fractured welds across a section, or any post that supports a gate. Gate posts carry cantilevered loads that multiply stress on every weld and footing. A failed gate post is a safety hazard, not just a cosmetic problem.
Pro Tip: When splicing rails, match the wall thickness and outside diameter of the original stock as closely as possible. A sleeve that’s even 1/16″ undersized will rock in the joint and the weld will crack under thermal cycling.
How to remove rust without damaging decorative or historic detail
Pick the least aggressive method that removes loose rust and leaves sound metal intact. Aggressive tools remove good metal along with the bad, and on historic scrollwork or cast ornaments, that damage is permanent.
The NPS conservation workflow is explicit on this point: use fine wire brushes rather than aggressive blasting for historic ironwork, and work methodically rather than quickly.
| Method | Best for | Limitations |
|---|---|---|
| Hand wire brush / fine wire cup brush | Light surface rust, decorative detail, historic ironwork | Slow; won’t reach tight crevices |
| Angle grinder with flap disc (80–120 grit) | Moderate rust on flat or curved sections of modern steel | Too aggressive for cast iron or thin historic metal; can remove decorative relief |
| Chemical rust remover (phosphoric acid gel) | Pitted surfaces, tight joints, areas inaccessible to mechanical tools | Requires neutralization; can stain masonry; slower than mechanical methods |
| Sandblasting / media blasting | Heavy rust on modern tubular steel sections being fully stripped | Erases fine detail on cast or wrought iron; requires containment and permits in some areas |
For most residential wrought iron fence repair, an angle grinder with a 120-grit flap disc handles the flat sections, and a fine wire cup brush or rotary wire attachment handles rails and scrollwork. Work from coarser to finer: knock off the heavy scale first, then refine.
Protect what’s around the fence. Cover stone, brick, and concrete with heavy plastic sheeting before you start. Rust converter chemicals and paint overspray can permanently stain masonry. Wet down nearby plants before work and rinse them again when you’re done.
Pro Tip: For tight joints between pickets and rails, a small rotary tool with a wire wheel attachment reaches where no brush or disc can. Keep the speed moderate on cast iron; high RPM generates heat that can crack brittle castings.
How to treat residual rust and choose the right primer
Once mechanical removal is done, some rust remains in pits and crevices. That’s where rust converters earn their place. A converter doesn’t remove rust; it reacts with iron oxide and converts it to a stable compound that won’t continue corroding under the primer.
When to use a converter vs. a remover:
Use a rust converter (phosphoric- or tannic-acid based) when rust remains in pits after mechanical prep and you can’t reach it with tools. Apply to damp-free metal, let it cure fully, and prime over the blackened surface it leaves.
Use a rust remover (typically a stronger acid solution or naval jelly) when you need to dissolve rust from a surface before mechanical work, or when the surface is too irregular for brushing.
Skip both and go straight to primer only when the surface is already bright, clean metal with no remaining oxide.
The NPS guidance notes that phosphoric-acid converters are moisture-sensitive during cure: if humidity is high or rain hits the surface before the converter has fully cured, it can chalk and lose adhesion. Apply converters only when temperatures are between 50°F and 90°F and no rain is forecast for at least 24 hours.
Rust-Oleum’s Rust Reformer is one widely available product that converts rust into a paintable surface; the product line includes both liquid and gel formats, with gel better suited to vertical surfaces and tight joints where liquid would run.
Primer selection:
Epoxy metal primer bonds aggressively to bare metal and converted surfaces; it’s the most durable choice for fences in wet climates or coastal areas.
Oil-based rust-inhibiting primer is easier to apply by brush and compatible with most topcoats; a good choice for standard residential repairs.
Apply primer within the converter manufacturer’s recommended window (typically 24 hours after cure) to prevent flash rust on bare metal areas.
Topcoat options and how to apply them for long-term protection
Oil-based or epoxy-based metal paints, and specialized outdoor enamel formulated for ferrous metal, give the best durability on iron fencing. Water-based acrylic metal paints have improved, but in North Texas heat and UV conditions, an oil-based enamel or a two-part epoxy topcoat still outperforms them over a multi-year cycle.
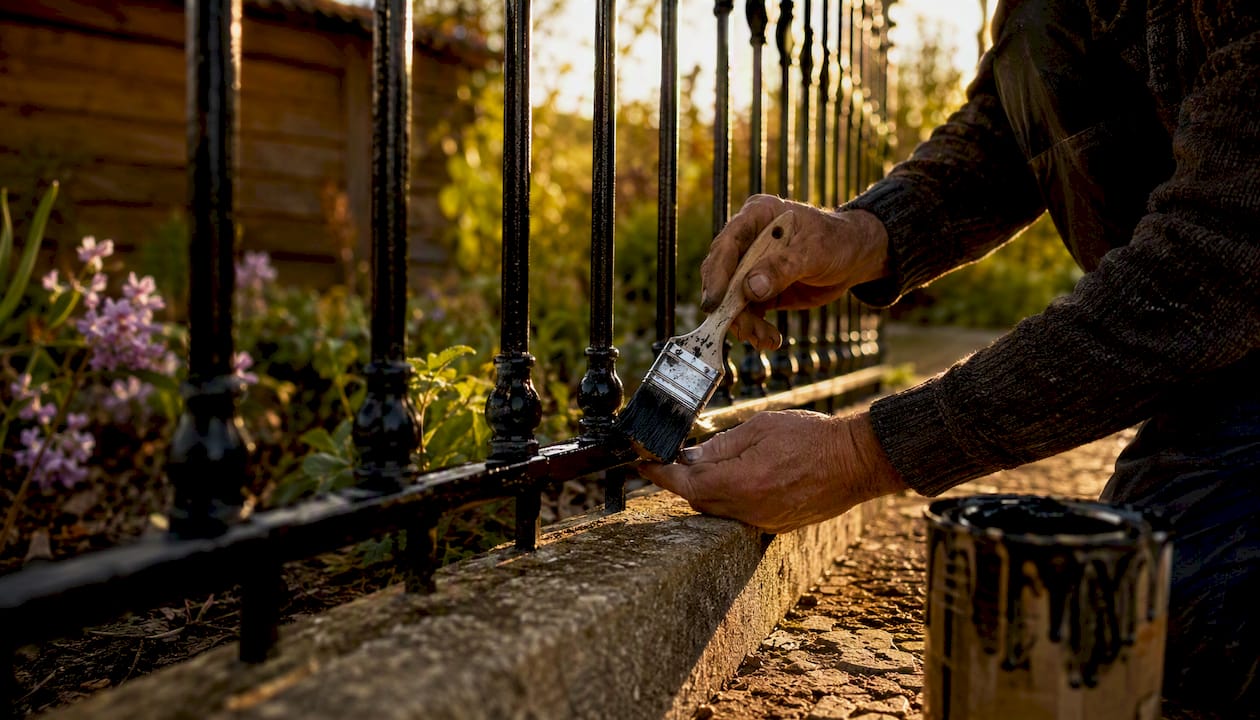
Application basics: Two thin coats beat one thick coat every time. A thick coat sags, traps solvent, and cracks as it cures. Brush application gives better penetration into joints and scrollwork than spray; spray is faster on long flat sections. If you spray, mask everything within 6 feet and work on a calm day. Allow full dry time between coats per the manufacturer’s spec, not just surface-dry time. Surface-dry can happen in an hour; full cure for an oil-based enamel is typically 24–48 hours.
For color matching on a partial repair, bring a photograph and a scraped paint chip to a paint supplier. Most can tint a metal enamel to match. A mismatched patch is more visible than the original rust.
For coastal or high-UV environments: A clear enamel topcoat over the color coat adds a sacrificial layer that takes UV degradation before the pigmented layer does. In high-salt air, a zinc-rich primer under the color coat provides cathodic protection at any future scratch or chip.
Pro Tip: Paint the undersides of rails and the backs of pickets first. Those surfaces collect water and are the first to fail. Most homeowners paint only what they can see from the street, and that’s exactly where the next rust cycle starts.
Tools and materials checklist for basic iron fence repair
Gather everything before you start. Mid-repair supply runs break momentum and extend drying windows.
Tools:
Wire brushes (hand brush and cup brush for drill or angle grinder)
Angle grinder with flap discs (80 and 120 grit) and a cut-off disc
Cordless drill with a bit set and screw extractor set
Rotary tool with wire wheel attachment (for tight joints)
Wrenches and socket set for hardware replacement
Plastic sheeting and painter’s tape for containment
Paintbrushes (2″ and 1″ for detail work) and a small foam roller for flat sections
Consumables and chemicals:
Rust converter (phosphoric- or tannic-acid based)
Naval jelly or rust remover gel for heavy pitting
Epoxy metal primer or oil-based rust-inhibiting primer
Outdoor metal enamel topcoat (oil-based or epoxy-based)
Replacement bolts, nuts, and washers (grade-5 minimum)
Epoxy putty for filling small voids or cracks before priming
Anti-seize compound for fasteners
PPE and containment:
N95 respirator minimum for sanding and grinding (N100 if lead paint is confirmed or suspected)
Safety glasses or face shield
Chemical-resistant gloves for rust converter and primer work
Hearing protection for angle grinder use
Heavy plastic sheeting and drop cloths to contain debris and paint chips
Typical repair costs and timelines for U.S. homeowners
The biggest cost drivers include the extent of rust, welding requirements, part sourcing, and local labor rates. Simple surface-rust repaint projects are typically short and affordable, whereas full structural repairs with resetting and welding require professional multi-day efforts.
Variables that push costs higher:
Difficult site access (steep grade, narrow side yard, landscaping obstacles)
Historic or custom decorative detailing that requires hand-matching
Sandblasting or media blasting for heavy corrosion
Multiple sections needing simultaneous repair
Permit requirements for structural work in some municipalities
Travel costs for contractors in rural or outlying areas
When should you hire a pro instead of doing it yourself?
Hire a professional when the damage is structural, when safety is at stake, or when the repair requires skills or equipment most homeowners don’t have. The complete wrought iron repair guide from SI Handrails puts it plainly: larger structural breaks are best handled by professionals, and restoration work is time- and skill-intensive beyond the scope of most novice DIYers when structural damage is present.
Red flags that mean call a contractor now:
Any post that feels soft or spongy when you press it
Metal that crumbles or flakes away in chunks rather than surface scale
Posts set in crumbling or heaved concrete that can’t be stabilized without excavation
Multiple failed welds across a section or along a gate frame
A gate that no longer closes, latches, or hangs level (gate posts carry cantilevered loads that stress every joint)
A fence on a historic property where material matching and conservation standards apply
Questions to ask before you hire:
Are you fully insured, and can you provide a certificate of insurance?
Do your own crews do the work, or do you subcontract?
Can you show before/after photos of similar iron fence repairs?
What does the warranty cover, and for how long?
Will you provide a written scope of work and timeline before starting?
Do you test for lead paint before grinding or welding?
A contractor who hesitates on any of those questions is worth passing on. Eastonfencingtx uses in-house craftsmen for every project, carries full insurance, and provides written estimates with documented scope before any work begins.
Safety, environmental, and permit considerations
Safety and environmental rules can change your entire repair method. Test for lead paint first, and if the result is positive, stop and reassess before grinding or sanding anything.
Fences painted before 1978 have a meaningful probability of containing lead-based paint. Disturbing that paint with a grinder or wire brush generates fine dust that is hazardous to breathe and must be contained to prevent contamination of surrounding soil. The NPS lead guidance and OSHA’s lead standards both require containment, proper PPE (N100 respirator, disposable coveralls, gloves), and proper disposal of contaminated debris. In many states, lead paint removal above a certain threshold requires a licensed lead-safe contractor.
Safety checklist for any iron fence repair:
Test for lead paint before any sanding, grinding, or welding on pre-1978 fences
Wear an N95 or better respirator whenever grinding or sanding; upgrade to N100 if lead is present
Use eye protection and hearing protection for all power tool work
Cover stone, masonry, and plants before applying rust converter or primer
Neutralize acid-based cleaners with a baking soda solution before rinsing
Bag and dispose of paint chips and rust debris per your local municipality’s hazardous waste guidelines
Permits and HOA rules: Most cosmetic repairs (repainting, replacing a picket) don’t require a permit. Structural work, post replacement, or any change to fence height or location may trigger a permit requirement in your municipality. Check with your local building department before starting structural repairs. If your property is governed by an HOA, review the CC&Rs for approved colors and materials before you buy paint.
How Easton Fencing approaches iron fence repair and restoration
Eastonfencingtx follows a structured, field-tested workflow on every repair project: assess and document first, stabilize structural issues before any surface work, complete full rust treatment, apply primer, and finish with a multi-coat paint system matched to the original or specified color. Every step is performed by in-house craftsmen, not subcontractors, which means the same crew that assesses the fence is the crew that repairs it.
What homeowners can expect from an Easton Fencing repair:
A free on-site estimate with documented before photos and a written scope of work
Material identification (cast vs. wrought vs. modern steel) to ensure the correct repair method
In-house welding for structural repairs, rail splices, and gate frame corrections
Full rust treatment using converters and rust-inhibiting primers before any topcoat
Color matching for partial repairs so the repaired section blends with the existing fence
Fully insured work with a clear warranty on labor and materials
Scheduling transparency: for most North Texas projects, Eastonfencingtx provides a realistic start date at the estimate stage, not after a deposit clears
Before the crew arrives, clear access along the fence line, move any vehicles or equipment within 6 feet of the fence, and note any areas where underground utilities may be close to post bases. That preparation lets the crew start immediately rather than spending the first hour moving obstacles.
Eastonfencingtx serves residential and commercial properties across North Texas, including Allen, Parker, and surrounding Collin County communities. For gate-specific structural repairs, the team also handles automatic gate alignment and operator issues as part of the same project scope.
What we’ve learned from years of iron fence repairs
The most common mistake we see is painting over rust. It looks fine for one season, then the paint bubbles from underneath and the rust is worse than before because it’s been sealed in with moisture. The second most common mistake is attempting a weld without cutting back to clean metal first. A weld on rusted stock looks solid until the first thermal cycle cracks it open.
Two field tips worth keeping: first, do a “feel and tap” check every spring and fall. Run your hand along every rail and tap with a knuckle. A hollow sound or a soft spot under your thumb is an early warning that costs $50 to fix now and $500 to fix in two years. Second, keep your before/after photos. They matter for warranty claims, for HOA documentation, and for resale. A buyer who can see a documented repair history on a fence is a more confident buyer.
One more reminder: document the work before you close it up. A photo of the bare metal, the primer coat, and the finished surface takes five minutes and creates a record that protects you.
Easton Fencing TX offers free estimates for professional iron fence repair
If the inspection turned up soft metal, failed welds, or a gate that won’t close, the repair is past the DIY threshold. Eastonfencingtx provides professional wrought iron fence repair and restoration across North Texas, with in-house welding, full rust treatment, and color-matched multi-coat paint systems, all performed by the same insured crew from estimate to final coat.
The estimate is free, on-site, and includes before photos, a written scope, and a clear timeline. There are no subcontractors, no vague verbal quotes, and no surprises when the invoice arrives. For homeowners who want the repair done right the first time, request a free estimate from Eastonfencingtx and have a professional assess the fence in person. You can also browse the gallery of completed North Texas projects to see the quality of work before you commit.
Sources
Consult these sources for conservation-grade methods, product specifications, and authoritative safety guidance before starting any iron fence repair project.
The U.S. National Park Service’s iron fence repair article at nps.gov covers the full conservation workflow: documentation, fine wire brush technique, rust converter application, and priming and painting. It is the most authoritative free resource for historic ironwork and sets the standard that professional conservators follow.
The SI Handrails complete wrought iron repair guide (sihandrails.com) provides a detailed homeowner-focused walkthrough of the inspect-remove-treat-prime-paint sequence, with practical notes on epoxy putty for small cracks and guidance on when structural damage requires professional welding.
Rust-Oleum’s Stops Rust / Rust Reformer product pages (rustoleum.com) give manufacturer-specific application instructions, gel vs. liquid format comparisons, and curing time requirements for their converter line. Always cross-check the product page for the specific formulation you purchase, as instructions vary.
The Ironsidewear iron fence repair guide (ironsidewear.com) is written for homeowners and gives a clear, practical breakdown of DIY scope vs. professional scope, with useful notes on when deep pitting crosses the threshold into section replacement.
Iron Fence Repair (U.S. National Park Service)
Complete Guide to Wrought Iron Fences & Railings Repair